300x250 AD TOP

Showing posts with label windows. Show all posts

Monday, January 6, 2014

Tagged under: , ,

WeChat for PC Download – Computer Running Windows 7 Vista XP

WeChat is a mobile Android app for chatting with your friends and family, using a valid internet connection. Now you can download and use WeChat on your PC. You must be running Windows XP, Vista, 7 or 8 for this to work. Here’s how to download WeChat for PC:



Download the WeChat APK
Download an Android Emulator – YouWave, Intel Appup or Bluestacks are all good ones but BlueStacks comes highly recommended.
Install your choice of emulator onto your PC – simply double click on the file to launch the install procedure and follow the instructions
Locate the WeChat APK you have already downloaded and open it using your emulator
WeChat will now be installed directly to your PC

Method 2

Open up your emulator by double clicking on the icon
Using the Search bar facility, type in “WeChat” and the emulator will search for it
When it has located the app, click on it and install it. Try to save it directly to your desktop if you have the choice


HOW TO RUN WECHAT ON YOUR PC :
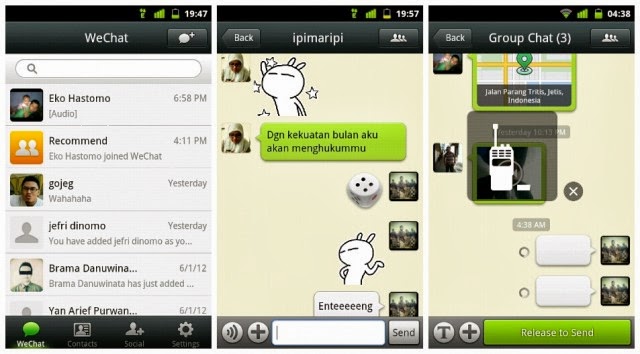


Running WeChat on your PC is a simple matter once you have installed it:

Locate the WeChat file you installed in the last step. Hopefully it has successfully saved to your desktop. If not and you used BlueStacks, look in your Apps folder. Failing that use the Windows search facility to locate it
You can send it to your desktop as a shortcut – right click on the file, select Send To and pick the Desktop option. This will make it easy for you to open the app later on
Now, go to the app icon, double-click on it and WeChat will launch, ready for use.

If you already use WeChat on your Android mobile device simply sign in with your current login details.
Tuesday, November 26, 2013

Tagged under: , ,

New Windows 8 Shortcut Keys

New Windows 8 Shortcut Keys

There might be a couple of new keys that aren’t included in this list, but as far as we know, these are the most important ones.

1. Win + C (Charms Bar)
2. Win + Print Screen (Takes Screenshot and Saves it in Picture Library)
3. Win + Tab (Opens Switch List)
4. Win + X (Opens Admin Menu)
5. Win + Q (Opens Quick Search)
6. Win + W (Quick Search of Settings)
7. Win + F (Quick Search for Files)
8. Win + E (Opens My Computer)
9. Ctrl + Shift + Esc (Opens Task Manager)
10. Win + . (Cascade Open Apps)
11. Win + , (Aero Peek)
12. Win + Z (Opens Metro App Options)
13. Win + H (Opens Share Menu)
14. Win + I (Opens Setting Menu)
15. Win + P (Opens Second Screen/ Projector Settings)
16. Win + K (Opens Devices Settings)
17. Win + T (Preview Opened Windows in Taskbar)
18. Win + U (Opens Ease of Access Center)
19. Win + R (Opens Run Dialogue Box)
20. Win + Pause (Opens System Properties Window)
21. Win + Enter (Opens Windows Narrator)
22. Win + D (Go to Desktop)
23. Win + M (Minimizes All Applications)
24. Win + B (Go Back to Desktop)
25. Win + J (Switches Focus Between Snapped/Cascaded Metro apps)
26. Win + L (Lock Screen)
27. Ctrl + Mouse Scroll (In Desktop, Changes Icon Size. In Start Screen, toggles Zoom-in/Zoom-out )
28. Ctrl + Shift + N (Creates a New Folder)

tags:windows 8 shortcut keys pdf
windows 8 shortcut keys shutdown
windows 7 shortcut keys
windows 8 shortcut keys pdf free download
windows shortcut keys
windows 8 product keys
windows 8 shutdown
windows 8 theme

Monday, February 18, 2013

Tagged under:

How to Hide any Local Drive using Command prompt

Today Computer World tutorial is about how to hide a local drive without any 3rd party software. There are lots of free and payable software's available to hide local drive, but I'm not gonna talk about hide a local drive using a software. In this tutorial I'll show you an easiest way to hide local drive without using software. This will save your both money and time.

There are 3 methods available to hide a local drive without using any software

1. Hide a drive through gpedit
2. Hide a drive through regedit
3. Hide a drive using command prompt


Today we are covering command prompt way of doing it. So lets see how to do.


How to Hide a Local Drive using command prompt?


1. Click on Start - Run

2. In Run box type cmd and hit Enter. Now Command Prompt window will appear.

3. In command prompt, type diskpart and hit Enter.

4. Then type list volume and hit Enter.

Now it will display the list of all your computer drives details.


5. Then type the Drive Letter which you want to hide.
If you want to hide volume E, type select volume E and hit Enter.

Now follow mentioned massage will appear to you.
Volume 4 is the selected volume


6. After that, type remove letter E and hit an Enter.

That's all, you have done. Now restart your computer once. When you start your PC again, you want be able to see the particular drive in My Computer.


How to get back Hidden Drive again in My Computer.

Do the procedure which i have mentioned in step 1,2,3,4 and 5 again.

Click Start --> Run --> cmd -->

Then type diskpart - list volume - select volume E

After that type assign letter E and hit Enter.

That's all !! You have got back the hidden local drive. Once again restart your PC, now you will be able to see hidden local drive in My Computer.


Note: Your PC doesn't lost any data by doing this trick .


Dear Friends !!! I'm kindly request you all to LIKE our Facebook Fan Page.
LIKE us on Facebook & Get Daily updates Easily.

Saturday, February 16, 2013

Tagged under: ,

Download Glass Skin Pack for Windows 7

Hello friends, Today I came with one of the most beautiful tips about Windows 7. Most of you get bored by using the same interface in your Windows 7 PC. So here I'll give you the Glass interface skin pack for Windows 7.


This free Glass interface skin pack will make your Windows more attractive and colorful. After the installation completes you will feel a fresh mind while working with Windows 7. If you're a Windows 7 user, don't wait anymore. Download the free skin pack and transform Windows 7 to Glass GUI. You candownload both 32-bit and 64-bit from following links.


Download Glass Skin Pack for Windows 7 32-bit

Download Glass Skin Pack for Windows 7 64-bit

Note: Before install this skin pack, uninstall if any other skin pack installed.


Dear Friends !!! I kindly request you all to LIKE our Facebook Fan Page.
LIKE us on Facebook & Get Daily updates Easily.

Friday, February 15, 2013

Tagged under: ,

Change Any Drive Background Without Software


Change Any Drive Background Without Software

We all might have set background images for the Local drives in Windows XP. But you might not have set background picture for your pendrive. It's a very simple hack so give it a try after reading this post, All you need to do is, just Copy & Paste the below code to notepad, then save it as desktop.ini


[.ShellClassInfo]
IconFile=%SystemRoot%system32SHELL32.dll
IconIndex=127
ConfirmFileOp=0
[{BE098140-A513-11D0-A3A4-00C04FD706EC}]
Attributes=1
IconArea_Image=”YourPictureName.jpg”
IconArea_Text=”0xFFFFFF”
VeBRA sources – don’t delete the tag above, it’s there for XXXXX purposes -
[ExtShellFolderViews]
{BE098140-A513-11D0-A3A4-00C04FD706EC}={BE098140-A513-11D0-A3A4-00C04FD706EC}
{5984FFE0-28D4-11CF-AE66-08002B2E1262}={5984FFE0-28D4-11CF-AE66-08002B2E1262}
[{5984FFE0-28D4-11CF-AE66-08002B2E1262}]
PersistMoniker=Folder.htt
PersistMonikerPreview=%WebDir%folder.bmp


Some Information On Above Code:
Where “YourPictureName.jpg” is, delete that and replace with your picture name for example“abc.jpg”

Note:

Please check that Picture format (.jpg , .bmp, .gif) properly else this hack won't work.
If your Picture is white colour then folder names will not be clear so change the IconArea_Text=0xFFFFFF to IconArea_Text=”0x000000
Save the notepad as “desktop.ini”.
Place both your notepad file (i.e) desktop.ini and your picture in Pendrive.
Set the above files attributes as Hidden.
Refresh(F5) and Enjoy with your new background.
You can also this on your windows Xp Local drives(C,D,E,F).
IF above Code Not Work Then Try This


[ExtshellFolderViews]
{BE098140-A513-11D0-A3A4-00C04FD706EC}={BE098140-A513-11D0-A3A4-00C04FD706EC}
[{BE098140-A513-11D0-A3A4-00C04FD706EC}]
IconArea_Image=test1.jpg

Tuesday, February 12, 2013

Tagged under: , ,

HACK ADMIN PASSWORD THROUGH GUEST ACCOUNT


Hello guys, Today will provide you 2 awesome and easy trick through which you can hack admin account through guest account.
If you been using someones PC in guest account and want to have Admin privilege then worry not,there is a trick for you to Gain Admin Privilege .
lets get started with it.


Method 1.1) Go to C:/windows/system32.

2) Copy cmd.exe and paste it on desktop.

3) Rename cmd.exe to sethc.exe.

4) Copy the new sethc.exe to system 32,when windows asks for overwriting the file,then click yes.

5) Now Log out from your guest account and at the user select window,press shift key 5 times.

6) Instead of Sticky Key confirmation dialog,command prompt with full administrator privileges will open.

7) Now type “ NET USER ADMINISTRATOR "zzz" where “zzz" can be any password you like and press enter.

8) You will see “ The Command completed successfully" and then exit the command prompt and login into administrator with your new password.


9) Bravo !! Now You have hacked admin through guest account.


================================
Method 2 This is another method you can use to hack admin password without knowing it.
It is possible to change Administrator password both in Win XP and Vista without knowing it. If you some how manage to login as an Administrator then you can change the password without knowing it.

Here’s the Step-By-Step instructions.

1. Right-click on the “My Computer” icon on the desktop OR in the Start Menu.

2. Select the option “Manage”.

3. On the left pane expand the “Computer Management (Local) tree (if it is not already expanded)

4. Double click “Local Users and Groups” option From “System Tools” tree.

5. Click the “Users” option.

6. Now you will see the list of users on the right side pane, such as Administrator, Guest etc.

7. Right click the “Administrator” and select the option “Set Password” option.

8. Now you will see a warning message, Click on proceed.

9. Now the system asks you for “New Password” and “Confirm Password” .

10. After entering the password click on “OK”. The password is changed. That’s It!..

you have now successfully changed admin password without knowing it.

I hope you like both the methods that i provided you today.
I also hope you will recommend us on Google before reading next article. plz click g+1

thanks :)

Thursday, January 31, 2013

Tagged under: ,

Remove Genuine Advantage Notification in Windows 7


Remove Genuine Advantage Notification in Windows 7

Windows 7 may sometimes been detected as illegal, not genuine,or Pirated despite the operating system has been genuinely bought from market. Then it shows a message immediately after log on, the following Windows Activation window will be displayed.

Windows is not genuine
Your computer might not be running a counterfeit copy of Windows.
0×80070005
Moreover, the computer desktop background is turned to black, after some time of logging in and the following error message is shown on the bottom right corner of the screen:

This copy of Windows is not genuine
When you try to view the system information in System Properties (Control Panel -> System and Security -> System), the following error message can be seen:

You must activate today. Activate Windows nowUsing slmgr.vbs /dlv or slmgr.vbs /dli in an elevated command prompt with administrator privileges to view the licensing status will return the following message instead:

Error: 0×80070005 Access denied: the requested action requires elevated privileges
Normally, the suddenly or random deactivation of an activated Windows 7 on genuine platform can be resolved by simply restarting the computer, so thatWindows 7 can re-access the activation status to return the computer to activated status. However, in some cases, where modification has been done to HKU\S-1-5-20 registry key causing the Network Service account to lose and missing full control and read permissions over the registry key, the losing of activated status may happen on Windows 7 too.
Microsoft explains in KB2008385 that the possible cause for the Windows 7 turned pirated error is likely the result of applying a Plug and Play Group Policy object (GPO):
Computer Configuration -> Policies -> Windows Settings -> Security Settings -> System Services -> Plug and Play (Startup Mode: Automatic)
The Windows 7 Licensing service uses Plug and Play to obtain hardware ID information and binds the license to the computer, thus change to the setting can result in an activated system appearing to be out of tolerance. The default permissions of the Plug and Play policy do not grant the Licensing service, which runs under the Network Service account, the appropriate rights to access the Plug and Play service. To fix and resolve the Windows 7 activation lost issue, and make the Windows 7 activated and genuine again, just follow one of the two Methods stated Below:

Method I: Disable the Plug and Play Policy


Determine the source of the policy. To do this, follow these steps:
On the client computer experiencing the activation error, run the Resultant Set of Policy wizard by clicking Start >> Run (or press Win+R keys), and entering rsop.msc as the command.


Visit the following location:Computer Configuration -> Policies -> Windows Settings ->Security Settings -> System Services


If the Plug and Play service is configured through a Group Policy setting, you see it here with settings other than Not Defined. Additionally, you can see which Group Policy is applying this setting.
Disable the Group Policy settings and force the Group Policy to be reapplied.
Edit the Group Policy that is identified in Step 1 and change the setting to “Not Defined.” Or, follow the section below to add the required permissions for the Network Service account.
Force the Group Policy setting to reapply: gpupdate /force (a restart of the client is sometimes required).Method II: Edit the permissions of the Group Policy

Open the Group Policy that is identified in Method I, Step 1 above, and open the corresponding Group Policy setting.
Click the Edit Security button, and then click the Advanced button.
In the Advanced Security Settings for Plug and Play window click Addand then add the SERVICE account. Then, click OK.
Select the following permissions in the Allow section and then click OK:Query template
Query status
Enumerate dependents
Interrogate
User-defined control
Read permissions
Run gpupdate /force after applying the permissions to the Group Policy setting.
Verify that the appropriate permissions are applied with the following command:sc sdshow plugplay
The following are the rights applied to the Plug and Play service in SDDL:D:(A;;CCDCLCSWRPWPDTLOCRSDRCWDWO;;;SY)
(A;;CCDCLCSWRPWPDTLOCRSDRCWDWO;;;BA)
(A;;CCLCSWLOCRRC;;;IU)
(A;;CCLCSWLOCRRC;;;SU)
S:(AU;FA;CCDCLCSWRPWPDTLOCRSDRCWDWO;;;WD)Note: (A;;CC LC SW LO CR RC ;;;SU is an Access Control Entry (ACE) that allows the following rights to “SU” (SDDL_SERVICE – Service logon user):A: Access Allowed
CC: Create Child
LC: List Children
SW: Self Write
LO: List Object
CR: Control Access
RC: Read Control
SU: Service Logon UserIf there are no GPO’s in place, then another activity may have changed the default registry permissions. To resolve this problem, perform the following steps:

Click Start Menu, Then Run, then enter REGEDIT
Right-click the registry key HKEY_USERS\S-1-5-20, and select Permissions… button.
If the NETWORK SERVICE is not present, click Add… button.
In Enter the object names to select type Network Service and then click Check Names andOK.
Select the NETWORK SERVICE and Grant Full Control and Read permissions.
Restart the computer.
After the restart, the system may require activation. Complete the activation.

Wednesday, December 19, 2012

Tagged under: ,

Install Windows 8 On Pendrive

Install Windows 8 On Pendrive

If want to install windows latest o/s on your PC using USB Pendrive then here is how you can do this. Windows 8, the latest edition to Microsoft’s OS evolution is making big waves in the PC arena. We are sure that many of you are eagerly waiting to try out the new Windows 8 Preview on your PCs, to have a first look and glimpse of what Microsoft has in store for you with the new operating system. Installing Windows 8 on your PC, which already has Windows 7 or Windows XP installed can be quite a task—backing up data, clearing space for the new OS, reinstalling, and so on.

However, before that, the pain of burning the downloaded ISO file on a DVD or on a USB pen drive to get the installation ready also makes it a killing task. We shall show you how you can relax and enjoy the complete features of Windows 8 on your existing PC without going through any of the above cumbersome exercises and run the new operating system in less than half the time.
This How to will reveal the installation of Windows 8 on any USB storage and then running the operating system directly from the USB drive, itself. You will not have to go through any of the painful set-up procedures that the set-up installer asks, while installing Windows 8 on your PC. All you need to do is download a simple utility, a 16GB or higher USB storage drive, the Windows 8 ISO file, WinRAR archiver and your existing PC. Before we begin, we would like you to know that using a USB pen drive will suffice, but since the speed of a regular USB pen drive is very sluggish, we recommend using an external USB storage drive.

Step 1


To begin with, assuming you have a PC that already has Windows 7 running and WinRAR installed, extract the file ‘install.wim’ from the Windows 8 ISO file using WinRAR. This file will be located under the folder ‘Sources’ and is around 2GB in size. Extract it to the desktop. Now go ahead and download a tiny 500 KB utility, called ‘GimageX’ from the ‘http://tinyurl.com/gimagexv2’ and extract the file to a folder on your desktop. This folder will have both the 32-bit and 64-bit utility. Choose the appropriate one depending on the operating system that you are already running on your PC. Now, before we use the utility, we have to prepare the USB drive for installing Windows 8. Make sure you have all your data backed up from the drive, as we would need to clean out the drive completely. Proceed ahead when ready.

Step 2


Plug-in the USB drive, wait for a while, if the drivers are not yet installed and let the system recognize the new drive. Now start the Windows command prompt and type the following commands one after the other as given below:

Diskpart (This built-in utility will help repartition and format the new drive)
List disk (This command will list all the drives present on your system. Note down the drive number of your USB drive)
Select disk # (Replace the # with the drive number that represents your USB drive in the list)
Clean (This command will wipe the entire partition table of the USB drive)
Create partition primary (This command will create a primary partition on the USB drive)
Select partition 1 (This command will select the primary partition for the rest of the process)
Format fs=ntfs quick (This command will quick format the primary partition in NTFS file format)
Assign (This command will assign a drive letter to the new partition for Windows to work on)
Active (This command will make the partition active to enable booting)
Exit (Closes the DISKPART utility)
Now that the drive is ready for installation of the new operating system, start the GimageX utility and click on the tab ‘apply’. In the source field, specify the ‘INSTALL.WIM’ file, which you earlier extracted from the Windows ISO file. In the destination field, select the USB drive letter that you just got ready. Let all the settings in the remaining fields be untouched and hit the ‘Apply’ button. GimageX will not extract the contents of the Install.wim file, which contains the necessary Windows 8 folders and system files on the USB drive. Note: This procedure should take a few minutes and will depend on the speed of your USB drive.
If you are using a regular pendrive, then the time taken will be longer than on any 2.5-inch external USB storage drive. Once done, GimageX will display that the process is complete. Exit the GimageX utility and start the command prompt again. We now need to make the USB drive bootable in order to run Windows 8 from the USB drive. For this, we will have to specify a command from the command prompt window. Run the following command as below.

Step 3


Bootsect f:windows /s f:In the command above, F: is the drive letter of the USB drive where the Windows 8 files have been extracted to earlier by the GimageX utility. Remember to replace the drive letter of your USB drive, accordingly. This command will take a few seconds to transfer the necessary booting files to the USB drive. Once done, you can quit from the command prompt.

Step 4


That’s it! Shut down your PC, get into the BIOS, enable booting from the USB drive and restart the PC. Your PC will now boot from the USB drive directly into Windows 8. All that is needed in the next step is to specify the serial key and give details, such as username and password. Windows will be up and running in no time and install the necessary drivers in the background. You can now go ahead and configure Windows 8, as you wish and install all your software and applications, as you would on a new PC. All software and applications will be installed on the USB drive by default, unless specified with a different path.

Step 5


Make sure you have an Internet connection set-up for your PC, if you are using your Microsoft Live (Hotmail) account to be linked with your Windows 8 installation. Once done, you can simply shut down, disconnect your USB drive and get back to your older operating system without any trace of having Windows 8 installed on your PC. You can plug-in this USB drive on any other PC and have Windows 8 running on that PC.
You can also use this trick to install Windows 8 on an internal hard drive and have Windows 8 installed without having to go through the entire process of installing the OS using a DVD ROM.

Sunday, December 9, 2012

Tagged under: ,

Microsoft Office Enterprise 2007 Full Version with Product Key

Microsoft Office 2007 (officially called 2007 Microsoft Office System) is a Windows version of the Microsoft Office System, Microsoft's productivity suite. Formerly known as Office 12 in the initial stages of its beta cycle, it was released to volume license customers on November 30, 2006 and made available to retail customers on January 30, 2007. These are, respectively, the same dates Windows Vista was released to volume licensing and retail customers. Office 2007 contains a number of new features, the most notable of which is the entirely new graphical user interface called the Fluent User Interface (initially referred to as the Ribbon User Interface), replacing the menus and tool bars – which have been the cornerstone of Office since its inception – with a tabbed toolbar, known as the Ribbon. Office 2007 requires Windows XP with Service Pack 2 or higher, Windows Server 2003 with Service Pack 1 or higher, Windows Vista or Windows 7. Office 2007 is the last version of Microsoft Office which is officially supported on Windows XP Professional x64 Edition.
The 'Ribbon User Interface' is a task-oriented Graphical User Interface (GUI). It features a central menu button, widely known as the 'Office Button'. The Ribbon Interface has been improved in Microsoft Office 2010.
Office 2007 also includes new applications and server-side tools. Chief among these is Groove, a collaboration and communication suite for smaller businesses, which was originally developed by Groove Networks before being acquired by Microsoft in 2005. Also included is Office SharePoint Server 2007, a major revision to the server platform for Office applications, which supports "Excel Services", a client-server architecture for supporting Excel workbooks that are shared in real time between multiple machines, and are also viewable and editable through a web page.
Microsoft FrontPage has been removed from the Office suite entirely. It has been replaced by Microsoft Office SharePoint Designer, which is aimed towards development of SharePoint portals. Its designer-oriented counterpart Microsoft Expression Web is targeted for general web development. However, neither application has been included in Office 2007.
Speech recognition and handwriting recognition are now part of Windows Vista. Speech and ink components have been removed from Office 2007. Handwriting and speech recognition work with Office 2007 only on Windows Vista or Windows XP Tablet PC Edition. However, XP users can use an earlier version of Office to use speech recognition.
According to Forrester Research, as of May 2010, Microsoft Office 2007 is used in 81% of enterprises it surveyed (its sample comprising 115 North American and European enterprise and SMB decision makers).

The complete office contains 2 parts of .rar file. Download all parts and then "Extract Here" after right click on first part.
Download The Two Parts and then Extract:
Part1 | Part2

Saturday, December 8, 2012

Tagged under: , ,

Advanced System Care 5.3.0 Pro Serial Number Full Version


Advanced System Care 5.3.0 Pro Serial Number Full Version


Advanced SystemCare 5.3.0 PRO Edition The World’s Top System Utility for Superior PC Health. Advanced SystemCare PRO (formerly Advanced WinodwsCare Professional) provides an always-on, automated, all-in-one PC Healthcare Service with anti-spyware, privacy protection, performance tune-ups, and system cleaning capabilities.

This powerful and award-winning precision tool fixes stubborn errors, cleans out clutter, optimizes internet and download speeds, ensures personal security and maintains maximum computer performance automatically.


Serial number Advanced System Care 5.3.0 Pro: D735F-51E93-1B1E4-C8AD4


Serial key Advanced System Care 5.3.0 Pro|Serial code Advanced System Care 5.3.0 Pro|Advanced System Care 5.3.0 Pro Crack


Download Here

Saturday, November 17, 2012

Tagged under: , , ,

Partition Data Recovery Software For Hard Disk, USB Cards


Partition Data Recovery Software For Hard Disk, USB Cards

Download free Partition Data Recovery Software Wizard and recover files From Hard disk, USB pen drive Cards and deleted, formatted or lost unallocated space use PartitionGuru is an excellent datarecovery tool and a powerful disk & partition management program.PartitionGuru is a partition management and data recovery program. In addition to traditional MBR partition table, it supports GUID partition table on GPT disks also.
In addition to basic partition management functions such as creating, deleting, hiding, formattingpartitions, it also provides more powerful functions like lost partitions recovery, deleted or lost files recovery, partition backup, partition clone, disk clone, quick partition, integral size partition, correct and check partition table error, advanced file operation, etc.
It also supports VMware, VirtualBox and Virtual PC virtual disk files. Support IDE, SCSI, SATA drive and USB disk, memory card. Supports FAT12 / FAT16 / FAT32 / NTFS / EXT3 file systems.


Recover lost partitions is one of the major function of PartitionGuru.When a lost partition is found, all attributes of the partition include all files in it will be displayed immediately. You can check the size and the type of the partition and even you can browse and preview all files and folders to check whether the partition is just your lost partition.

Recover Partition


PartitionGuru has powerful disk & partition management abilities, in addition to common functions such as creating, deleting, formatting, renaming and hiding partition, it provides more.

Recover Files


In many cases, a partition may become inaccessible and all files in it are lost. For example, a partition may be accidentally formatted while the files have no backups, a partition may be destroyed by virus or some software. When you try to open it with Windows Explorer, Windows usually prompt you the partition must be formatted.

DOWNLOAD HERE
Tagged under: , ,

Windows 7 Update Keygen


Windows 7 Update Keygen

Windows 7 is available in six different editions, but only Home Premium, Professional and Ultimate are widely available at retail. The other editions are focused at other markets, such as the developing world or enterprise use. Each edition of Windows 7 includes all of the capabilities and features of the edition below it. All editions support the 32-bit (IA-32) processor architecture and all editions except Starter support the 64-bit (x86-64) processor architecture (64-bit installation media is not included in HomeBasic edition, but can be obtained from Microsoft).
According to Microsoft, the features for all editions of Windows 7 are stored on the machine, regardless of what edition is in use. Users who wish to upgrade to an edition of Windows 7 with more features can then use Windows Anytime Upgrade to purchase the upgrade, and unlock the features of those editions.
Here’s keygen to upgrade them
just generate a key to version u want to upgrade
and follow the following steps:-
There are three anytime upgrade paths are available:
# Windows 7 Starter to Windows 7 Home Premium
# Windows 7 Home Premium to Windows 7 Professional
# Windows 7 Home Premium to Ultimate
Now, if you would like to do any of the above upgrade, you can follow the steps given below to make it happen.


Launch Windows Anytime Upgrade from the Start menu to see two options: purchase a WAUproduct key online or enter a WAU product key from a WAU retail package purchased in a store. Select the second option.


In the following screen, enter the WAU product key.
Accept the license agreement
You will be asked to save your work and close all running applications. The Windows 7 upgrade process will take 10 to 15 minutes.


You are done. Your PC will reboot once to finish the final step of Windows Anytime Upgrade process. You can now start playing with your new Windows 7 edition.


enjoy you new upgraded windows everything else you can find in info of keygen download keygen fromHERE

Thursday, November 8, 2012

Tagged under: ,

TuneUp Utilities 2013 13.0.2013.194 Final Multilingual Incl Patch


TuneUp Utilities 2013 13.0.2013.194 Final Multilingual Incl Patch
TuneUp Utilities 2013 13.0.2013.194 Final Multilingual Incl Patch | 25.5MB
TuneUp Utilities 2013 is a software for tuning and optimizing the system. With TuneUp Utilities you can clean the disks of dust, remove invalid entries from the registry, defragment, optimize memory, manage startup permanently delete files from the disc with TuneUp Shredder, change the look of Windows, and much more. All utilities in this package integrated into a single graphical environment.

The new Start page
Start page of this tell you about the status of the computerimprove computer performance, showing the automatic startupIf problems or nonoptimal settings are foundyou are just a mouse-click to finish the problem.

TuneUp Speed ​​Optimizer
with just one click you can do most optimizations very quicklyIn addition, TuneUp Speed ​​Optimizer provides suggestions for speeding up your system.

TuneUp Shortcut Cleaner
Delete shortcuts that are not valid from the Start menuDesktop and Quick Launch barTuneUp ShortCut Cleaner also checks frequently used programs and cleans up the list of recently opened files.

TuneUp Styler
You can also change the Vista logo animation which appears just before logonYou can download a whole series of great animations from the TuneUp websiteOrif you prefer, you can choose your own image to be displayed.

TuneUp StartUp Manager
Enhanced system to organize your programs into groups and provide an explanation for it easier for you to identify the programs that are not known so that you can disable unwanted entries more easily.

Free up disk space
Helping you turn off Windows functions that use excessive disk space has also been enhancedIn addition, TuneUp Disk Space Explorer now runs faster and no longer requires the entire drive to be analyzedNow you can specify that only those folders be analyzed.


Download Now
Rar Password
freesoft88.blogspot.com

Sunday, November 4, 2012

Tagged under: , ,

windows loader for windows 8 and windows 7 all versions

windows loader for windows 8 and windows 7 all versions ,download free cracked windows loader.activate windows 7 windows 8 all versions.
                                                        
                                                           DOWNLOAD HERE

Friday, October 5, 2012

Tagged under:

Windows Loader 2.0.9 Daz – Make Windows Genuine and Update-able


Windows Loader – Make Windows Genuine!

Here is one hell of a download. This activates pretty much any new Windows OS. Makes them genuine so you are free to update with no problems! Very easy to follow instructions and simple to run program so you’ll have your windows unlocked in no time and free to upgrade to any of the latest security patches!

No need for a serial! Patches Windows

Screen Shot:

SUPPORTED OPERATING SYSTEMS:

Windows 7 Ultimate
Windows 7 Ultimate E
Windows 7 Professional
Windows 7 Professional E
Windows 7 Home Premium
Windows 7 Home Premium E
Windows 7 Home Basic
Windows 7 Starter
Windows 7 Starter E
Windows Vista Ultimate
Windows Vista Business
Windows Vista Business N
Windows Vista Home Premium
Windows Vista Home Basic
Windows Vista Home Basic N
Windows Vista Starter
Windows Server 2008 R2: Enterprise
Windows Server 2008 R2: Standard
Windows Server 2008 R2: Foundation
Windows Server 2008: Enterprise
Windows Server 2008: Standard
Windows Server 2008: Foundation
Windows Small Business Server 2008
Windows Small Business Server 2011
-Note: You must be running build 7600 or greater for Windows 7 and Windows Server 2008 R2.
-Note: I don’t recommend using any of the Windows 7 E editions.
-Note: Windows 7 N editions will only be supported when OEM SLP serials leak.